


{"id":9192176386272,"title":"Sea to Summit Spark Pro 900+ Down Sleeping Bag -9C Regular - Beluga","handle":"sea-to-summit-spark-pro-900-down-sleeping-bag-9c-regular-beluga","description":"\u003ch2\u003eThe Spark Pro has been optimized for comfort, versatility and light weight.\u003c\/h2\u003e\n\u003cp\u003e\u003ciframe width=\"300\" height=\"169\" src=\"https:\/\/www.youtube.com\/embed\/CuLfXAz1BVU\" title=\"Spark Pro Down Sleeping Bag 950+ | Ultralight \u0026amp; Versatile\"\u003e\u003c\/iframe\u003e\u003c\/p\u003e\n\u003cp\u003e\u003cbr\u003e\u003c\/p\u003e\n\u003cdiv\u003e\u003cspan\u003e\u003ca href=\"https:\/\/www.furtherfaster.co.nz\/collections\/sea-to-summit-nz\" target=\"_blank\" title=\"Sleeping Bag NZ | Sea to Summit Spark Pro 900+ Down -9C Regular - Beluga\" rel=\"noopener\"\u003e\u003cimg alt=\"\" src=\"https:\/\/cdn.shopify.com\/s\/files\/1\/0415\/9817\/files\/af97a286-99d4-4136-946b-3138b3c3b94d._CR0_0_600_180_PT0_SX600_medium.jpg?v=1571260300\"\u003e\u003c\/a\u003e\u003ca rel=\"noopener\" href=\"https:\/\/www.furtherfaster.co.nz\/collections\/sea-to-summit-nz\" target=\"_blank\"\u003e\u003c\/a\u003e\u003ca rel=\"noopener\" href=\"https:\/\/www.furtherfaster.co.nz\/collections\/sea-to-summit-nz\" target=\"_blank\"\u003e\u003c\/a\u003e\u003c\/span\u003e\u003c\/div\u003e\n\u003cdiv\u003e\u003cbr\u003e\u003c\/div\u003e\n\u003ch3\u003eOverview\u003cbr\u003e\n\u003c\/h3\u003e\n\u003cp\u003eThe Spark Pro has been optimized for comfort, versatility and light weight. Our highest-lofting down - 950+ fillpower RDS-certified goose down with a non-PFAS Ultra-Dry Down treatment - is wrapped in extremely breathable 10D fabrics. The Free-Flow Zip system ensures maximum ventilation and the flexibility to open the bag flat as a quilt. Zip a Spark Pro to a Women's Spark and share the comfort with your companion.\u003c\/p\u003e\n\u003cp\u003eLower Temperature Rating: 15°F | -9°C\u003c\/p\u003e\n\u003cp\u003eWeight: 784g\u003c\/p\u003e\n\u003ch3\u003eFeatures\u003c\/h3\u003e\n\u003ch4\u003eKey Features\u003c\/h4\u003e\n\u003cul\u003e\n\u003cli\u003e\n\u003ch5\u003eRDS-certified, 950+ fillpower goose down with a non-PFAS Ultra-Dry Down treatment for maximum thermal performance\u003c\/h5\u003e\n\u003c\/li\u003e\n\u003cli\u003e\n\u003ch5\u003eFeatherweight 10D nylon shell with non-PFAS DWR, and a highly breathable 10D nylon liner for enhanced comfort\u003c\/h5\u003e\n\u003c\/li\u003e\n\u003cli\u003e\n\u003ch5\u003eTechnical hood, anatomical footbox and an ergonomic mummy shape - ultralight doesn't have to mean ultratight\u003c\/h5\u003e\n\u003c\/li\u003e\n\u003cli\u003e\n\u003ch5\u003eFree-Flow Zip System: YKK #5 side zipper with zipper plough for reliable, snag-free operation. YKK #3 footbox and shoulder zipper for minimal additional weight\u003c\/h5\u003e\n\u003c\/li\u003e\n\u003cli\u003e\n\u003ch5\u003eVertical chest baffles, horizontal baffles lower half and base, box wall baffle construction throughout\u003c\/h5\u003e\n\u003c\/li\u003e\n\u003cli\u003e\n\u003ch5\u003eFront draft collar is fitted around the neck and oversized at the shoulders to retain warmth\u003c\/h5\u003e\n\u003c\/li\u003e\n\u003cli\u003e\n\u003ch5\u003eSea to Summit Guarantee is offered for the Lifetime of this product\u003c\/h5\u003e\n\u003c\/li\u003e\n\u003c\/ul\u003e\n\u003ch3\u003eTechnical Specs\u003c\/h3\u003e\n\u003cul\u003e\n\u003cli\u003eBest Use: Ultralight Backpacking\u003cbr\u003e\n\u003c\/li\u003e\n\u003cli\u003eComes With: 40D recycled, bluesign APPROVED nylon compression bag\u003cbr\u003e\n\u003c\/li\u003e\n\u003cli\u003eInsulation: RDS certified, 950+ non-PFAS Ultra-Dry Down\u003cbr\u003e\n\u003c\/li\u003e\n\u003cli\u003eShape: Mummy\u003cbr\u003e\n\u003c\/li\u003e\n\u003cli\u003eZip Options: Free-Flow zipper system\u003c\/li\u003e\n\u003cli\u003eWeight: 784 g\u003c\/li\u003e\n\u003cli\u003eFill Weight: 480 g\u003c\/li\u003e\n\u003cli\u003eCompressed Volume: 7.0 L\u003c\/li\u003e\n\u003cli\u003eCompression Sack: 13 L\u003c\/li\u003e\n\u003cli\u003eTemperature Rating (ISO Lower Limit): -9°C\u003c\/li\u003e\n\u003cli\u003eWomen's Temp Rating (ISO Comfort): -3°C\u003cbr\u003e\n\u003c\/li\u003e\n\u003cli\u003eFits Up To Height: 185 cm\u003c\/li\u003e\n\u003c\/ul\u003e","published_at":"2026-02-10T19:13:58+13:00","created_at":"2026-02-10T16:04:21+13:00","vendor":"Sea to Summit","type":"Sleeping Bag","tags":[],"price":119999,"price_min":119999,"price_max":119999,"available":true,"price_varies":false,"compare_at_price":null,"compare_at_price_min":0,"compare_at_price_max":0,"compare_at_price_varies":false,"variants":[{"id":48750999437536,"title":"Default Title","option1":"Default Title","option2":null,"option3":null,"sku":"101301","requires_shipping":true,"taxable":true,"featured_image":null,"available":true,"name":"Sea to Summit Spark Pro 900+ Down Sleeping Bag -9C Regular - Beluga","public_title":null,"options":["Default Title"],"price":119999,"weight":0,"compare_at_price":null,"inventory_quantity":1,"inventory_management":"shopify","inventory_policy":"deny","barcode":"9327868990832","requires_selling_plan":false,"selling_plan_allocations":[],"quantity_rule":{"min":1,"max":null,"increment":1}}],"images":["\/\/www.furtherfaster.co.nz\/cdn\/shop\/files\/sea-to-summit-spark-pro-900-down-sleeping-bag--9c-regular-beluga-nz-01.webp?v=1770703985","\/\/www.furtherfaster.co.nz\/cdn\/shop\/files\/sea-to-summit-spark-pro-900-down-sleeping-bag--9c-regular-beluga-nz-02.webp?v=1770704023","\/\/www.furtherfaster.co.nz\/cdn\/shop\/files\/sea-to-summit-spark-pro-900-down-sleeping-bag--9c-regular-beluga-nz-03.webp?v=1770704023","\/\/www.furtherfaster.co.nz\/cdn\/shop\/files\/sea-to-summit-spark-pro-900-down-sleeping-bag--9c-regular-beluga-nz-04.webp?v=1770704023","\/\/www.furtherfaster.co.nz\/cdn\/shop\/files\/sea-to-summit-spark-pro-900-down-sleeping-bag--9c-regular-beluga-nz-05.webp?v=1770704023","\/\/www.furtherfaster.co.nz\/cdn\/shop\/files\/sea-to-summit-spark-pro-900-down-sleeping-bag--9c-regular-beluga-nz-06.webp?v=1770704023","\/\/www.furtherfaster.co.nz\/cdn\/shop\/files\/sea-to-summit-spark-pro-900-down-sleeping-bag--9c-regular-beluga-nz-07.webp?v=1770704023","\/\/www.furtherfaster.co.nz\/cdn\/shop\/files\/sea-to-summit-spark-pro-900-down-sleeping-bag--9c-regular-beluga-nz-08.webp?v=1770704023","\/\/www.furtherfaster.co.nz\/cdn\/shop\/files\/sea-to-summit-spark-pro-900-down-sleeping-bag--9c-regular-beluga-nz-09.webp?v=1770704023","\/\/www.furtherfaster.co.nz\/cdn\/shop\/files\/sea-to-summit-spark-pro-900-down-sleeping-bag--9c-regular-beluga-nz-10.webp?v=1770704023","\/\/www.furtherfaster.co.nz\/cdn\/shop\/files\/sea-to-summit-spark-pro-900-down-sleeping-bag--9c-regular-beluga-nz-11.webp?v=1770704023","\/\/www.furtherfaster.co.nz\/cdn\/shop\/files\/sea-to-summit-spark-pro-900-down-sleeping-bag--9c-regular-beluga-nz-12.webp?v=1770704023","\/\/www.furtherfaster.co.nz\/cdn\/shop\/files\/sea-to-summit-spark-pro-900-down-sleeping-bag--9c-regular-beluga-nz-13.webp?v=1770704023"],"featured_image":"\/\/www.furtherfaster.co.nz\/cdn\/shop\/files\/sea-to-summit-spark-pro-900-down-sleeping-bag--9c-regular-beluga-nz-01.webp?v=1770703985","options":["Title"],"media":[{"alt":"Sleeping Bag NZ | Sea to Summit Spark Pro 900+ Down -9C Regular - Beluga | Further Faster Christchurch NZ | #beluga","id":41461186789600,"position":1,"preview_image":{"aspect_ratio":1.0,"height":2048,"width":2048,"src":"\/\/www.furtherfaster.co.nz\/cdn\/shop\/files\/sea-to-summit-spark-pro-900-down-sleeping-bag--9c-regular-beluga-nz-01.webp?v=1770703985"},"aspect_ratio":1.0,"height":2048,"media_type":"image","src":"\/\/www.furtherfaster.co.nz\/cdn\/shop\/files\/sea-to-summit-spark-pro-900-down-sleeping-bag--9c-regular-beluga-nz-01.webp?v=1770703985","width":2048},{"alt":"Sleeping Bag NZ | Sea to Summit Spark Pro 900+ Down -9C Regular - Beluga | Further Faster Christchurch NZ | #beluga","id":41461187182816,"position":2,"preview_image":{"aspect_ratio":1.0,"height":2048,"width":2048,"src":"\/\/www.furtherfaster.co.nz\/cdn\/shop\/files\/sea-to-summit-spark-pro-900-down-sleeping-bag--9c-regular-beluga-nz-02.webp?v=1770704023"},"aspect_ratio":1.0,"height":2048,"media_type":"image","src":"\/\/www.furtherfaster.co.nz\/cdn\/shop\/files\/sea-to-summit-spark-pro-900-down-sleeping-bag--9c-regular-beluga-nz-02.webp?v=1770704023","width":2048},{"alt":"Sleeping Bag NZ | Sea to Summit Spark Pro 900+ Down -9C Regular - Beluga | Further Faster Christchurch NZ | #beluga","id":41461187150048,"position":3,"preview_image":{"aspect_ratio":1.0,"height":2048,"width":2048,"src":"\/\/www.furtherfaster.co.nz\/cdn\/shop\/files\/sea-to-summit-spark-pro-900-down-sleeping-bag--9c-regular-beluga-nz-03.webp?v=1770704023"},"aspect_ratio":1.0,"height":2048,"media_type":"image","src":"\/\/www.furtherfaster.co.nz\/cdn\/shop\/files\/sea-to-summit-spark-pro-900-down-sleeping-bag--9c-regular-beluga-nz-03.webp?v=1770704023","width":2048},{"alt":"Sleeping Bag NZ | Sea to Summit Spark Pro 900+ Down -9C Regular - Beluga | Further Faster Christchurch NZ | #beluga","id":41461187117280,"position":4,"preview_image":{"aspect_ratio":1.0,"height":2048,"width":2048,"src":"\/\/www.furtherfaster.co.nz\/cdn\/shop\/files\/sea-to-summit-spark-pro-900-down-sleeping-bag--9c-regular-beluga-nz-04.webp?v=1770704023"},"aspect_ratio":1.0,"height":2048,"media_type":"image","src":"\/\/www.furtherfaster.co.nz\/cdn\/shop\/files\/sea-to-summit-spark-pro-900-down-sleeping-bag--9c-regular-beluga-nz-04.webp?v=1770704023","width":2048},{"alt":"Sleeping Bag NZ | Sea to Summit Spark Pro 900+ Down -9C Regular - Beluga | Further Faster Christchurch NZ | #beluga","id":41461187084512,"position":5,"preview_image":{"aspect_ratio":1.0,"height":2048,"width":2048,"src":"\/\/www.furtherfaster.co.nz\/cdn\/shop\/files\/sea-to-summit-spark-pro-900-down-sleeping-bag--9c-regular-beluga-nz-05.webp?v=1770704023"},"aspect_ratio":1.0,"height":2048,"media_type":"image","src":"\/\/www.furtherfaster.co.nz\/cdn\/shop\/files\/sea-to-summit-spark-pro-900-down-sleeping-bag--9c-regular-beluga-nz-05.webp?v=1770704023","width":2048},{"alt":"Sleeping Bag NZ | Sea to Summit Spark Pro 900+ Down -9C Regular - Beluga | Further Faster Christchurch NZ | #beluga","id":41461187051744,"position":6,"preview_image":{"aspect_ratio":1.0,"height":2048,"width":2048,"src":"\/\/www.furtherfaster.co.nz\/cdn\/shop\/files\/sea-to-summit-spark-pro-900-down-sleeping-bag--9c-regular-beluga-nz-06.webp?v=1770704023"},"aspect_ratio":1.0,"height":2048,"media_type":"image","src":"\/\/www.furtherfaster.co.nz\/cdn\/shop\/files\/sea-to-summit-spark-pro-900-down-sleeping-bag--9c-regular-beluga-nz-06.webp?v=1770704023","width":2048},{"alt":"Sleeping Bag NZ | Sea to Summit Spark Pro 900+ Down -9C Regular - Beluga | Further Faster Christchurch NZ | #beluga","id":41461187018976,"position":7,"preview_image":{"aspect_ratio":1.0,"height":2048,"width":2048,"src":"\/\/www.furtherfaster.co.nz\/cdn\/shop\/files\/sea-to-summit-spark-pro-900-down-sleeping-bag--9c-regular-beluga-nz-07.webp?v=1770704023"},"aspect_ratio":1.0,"height":2048,"media_type":"image","src":"\/\/www.furtherfaster.co.nz\/cdn\/shop\/files\/sea-to-summit-spark-pro-900-down-sleeping-bag--9c-regular-beluga-nz-07.webp?v=1770704023","width":2048},{"alt":"Sleeping Bag NZ | Sea to Summit Spark Pro 900+ Down -9C Regular - Beluga | Further Faster Christchurch NZ | #beluga","id":41461186986208,"position":8,"preview_image":{"aspect_ratio":1.0,"height":2048,"width":2048,"src":"\/\/www.furtherfaster.co.nz\/cdn\/shop\/files\/sea-to-summit-spark-pro-900-down-sleeping-bag--9c-regular-beluga-nz-08.webp?v=1770704023"},"aspect_ratio":1.0,"height":2048,"media_type":"image","src":"\/\/www.furtherfaster.co.nz\/cdn\/shop\/files\/sea-to-summit-spark-pro-900-down-sleeping-bag--9c-regular-beluga-nz-08.webp?v=1770704023","width":2048},{"alt":"Sleeping Bag NZ | Sea to Summit Spark Pro 900+ Down -9C Regular - Beluga | Further Faster Christchurch NZ | #beluga","id":41461186953440,"position":9,"preview_image":{"aspect_ratio":1.0,"height":2048,"width":2048,"src":"\/\/www.furtherfaster.co.nz\/cdn\/shop\/files\/sea-to-summit-spark-pro-900-down-sleeping-bag--9c-regular-beluga-nz-09.webp?v=1770704023"},"aspect_ratio":1.0,"height":2048,"media_type":"image","src":"\/\/www.furtherfaster.co.nz\/cdn\/shop\/files\/sea-to-summit-spark-pro-900-down-sleeping-bag--9c-regular-beluga-nz-09.webp?v=1770704023","width":2048},{"alt":"Sleeping Bag NZ | Sea to Summit Spark Pro 900+ Down -9C Regular - Beluga | Further Faster Christchurch NZ | #beluga","id":41461186920672,"position":10,"preview_image":{"aspect_ratio":1.0,"height":2048,"width":2048,"src":"\/\/www.furtherfaster.co.nz\/cdn\/shop\/files\/sea-to-summit-spark-pro-900-down-sleeping-bag--9c-regular-beluga-nz-10.webp?v=1770704023"},"aspect_ratio":1.0,"height":2048,"media_type":"image","src":"\/\/www.furtherfaster.co.nz\/cdn\/shop\/files\/sea-to-summit-spark-pro-900-down-sleeping-bag--9c-regular-beluga-nz-10.webp?v=1770704023","width":2048},{"alt":"Sleeping Bag NZ | Sea to Summit Spark Pro 900+ Down -9C Regular - Beluga | Further Faster Christchurch NZ | #beluga","id":41461186887904,"position":11,"preview_image":{"aspect_ratio":1.0,"height":2048,"width":2048,"src":"\/\/www.furtherfaster.co.nz\/cdn\/shop\/files\/sea-to-summit-spark-pro-900-down-sleeping-bag--9c-regular-beluga-nz-11.webp?v=1770704023"},"aspect_ratio":1.0,"height":2048,"media_type":"image","src":"\/\/www.furtherfaster.co.nz\/cdn\/shop\/files\/sea-to-summit-spark-pro-900-down-sleeping-bag--9c-regular-beluga-nz-11.webp?v=1770704023","width":2048},{"alt":"Sleeping Bag NZ | Sea to Summit Spark Pro 900+ Down -9C Regular - Beluga | Further Faster Christchurch NZ | #beluga","id":41461186822368,"position":12,"preview_image":{"aspect_ratio":1.0,"height":2048,"width":2048,"src":"\/\/www.furtherfaster.co.nz\/cdn\/shop\/files\/sea-to-summit-spark-pro-900-down-sleeping-bag--9c-regular-beluga-nz-12.webp?v=1770704023"},"aspect_ratio":1.0,"height":2048,"media_type":"image","src":"\/\/www.furtherfaster.co.nz\/cdn\/shop\/files\/sea-to-summit-spark-pro-900-down-sleeping-bag--9c-regular-beluga-nz-12.webp?v=1770704023","width":2048},{"alt":"Sleeping Bag NZ | Sea to Summit Spark Pro 900+ Down -9C Regular - Beluga | Further Faster Christchurch NZ | #beluga","id":41461186855136,"position":13,"preview_image":{"aspect_ratio":1.0,"height":2048,"width":2048,"src":"\/\/www.furtherfaster.co.nz\/cdn\/shop\/files\/sea-to-summit-spark-pro-900-down-sleeping-bag--9c-regular-beluga-nz-13.webp?v=1770704023"},"aspect_ratio":1.0,"height":2048,"media_type":"image","src":"\/\/www.furtherfaster.co.nz\/cdn\/shop\/files\/sea-to-summit-spark-pro-900-down-sleeping-bag--9c-regular-beluga-nz-13.webp?v=1770704023","width":2048}],"requires_selling_plan":false,"selling_plan_groups":[],"content":"\u003ch2\u003eThe Spark Pro has been optimized for comfort, versatility and light weight.\u003c\/h2\u003e\n\u003cp\u003e\u003ciframe width=\"300\" height=\"169\" src=\"https:\/\/www.youtube.com\/embed\/CuLfXAz1BVU\" title=\"Spark Pro Down Sleeping Bag 950+ | Ultralight \u0026amp; Versatile\"\u003e\u003c\/iframe\u003e\u003c\/p\u003e\n\u003cp\u003e\u003cbr\u003e\u003c\/p\u003e\n\u003cdiv\u003e\u003cspan\u003e\u003ca href=\"https:\/\/www.furtherfaster.co.nz\/collections\/sea-to-summit-nz\" target=\"_blank\" title=\"Sleeping Bag NZ | Sea to Summit Spark Pro 900+ Down -9C Regular - Beluga\" rel=\"noopener\"\u003e\u003cimg alt=\"\" src=\"https:\/\/cdn.shopify.com\/s\/files\/1\/0415\/9817\/files\/af97a286-99d4-4136-946b-3138b3c3b94d._CR0_0_600_180_PT0_SX600_medium.jpg?v=1571260300\"\u003e\u003c\/a\u003e\u003ca rel=\"noopener\" href=\"https:\/\/www.furtherfaster.co.nz\/collections\/sea-to-summit-nz\" target=\"_blank\"\u003e\u003c\/a\u003e\u003ca rel=\"noopener\" href=\"https:\/\/www.furtherfaster.co.nz\/collections\/sea-to-summit-nz\" target=\"_blank\"\u003e\u003c\/a\u003e\u003c\/span\u003e\u003c\/div\u003e\n\u003cdiv\u003e\u003cbr\u003e\u003c\/div\u003e\n\u003ch3\u003eOverview\u003cbr\u003e\n\u003c\/h3\u003e\n\u003cp\u003eThe Spark Pro has been optimized for comfort, versatility and light weight. Our highest-lofting down - 950+ fillpower RDS-certified goose down with a non-PFAS Ultra-Dry Down treatment - is wrapped in extremely breathable 10D fabrics. The Free-Flow Zip system ensures maximum ventilation and the flexibility to open the bag flat as a quilt. Zip a Spark Pro to a Women's Spark and share the comfort with your companion.\u003c\/p\u003e\n\u003cp\u003eLower Temperature Rating: 15°F | -9°C\u003c\/p\u003e\n\u003cp\u003eWeight: 784g\u003c\/p\u003e\n\u003ch3\u003eFeatures\u003c\/h3\u003e\n\u003ch4\u003eKey Features\u003c\/h4\u003e\n\u003cul\u003e\n\u003cli\u003e\n\u003ch5\u003eRDS-certified, 950+ fillpower goose down with a non-PFAS Ultra-Dry Down treatment for maximum thermal performance\u003c\/h5\u003e\n\u003c\/li\u003e\n\u003cli\u003e\n\u003ch5\u003eFeatherweight 10D nylon shell with non-PFAS DWR, and a highly breathable 10D nylon liner for enhanced comfort\u003c\/h5\u003e\n\u003c\/li\u003e\n\u003cli\u003e\n\u003ch5\u003eTechnical hood, anatomical footbox and an ergonomic mummy shape - ultralight doesn't have to mean ultratight\u003c\/h5\u003e\n\u003c\/li\u003e\n\u003cli\u003e\n\u003ch5\u003eFree-Flow Zip System: YKK #5 side zipper with zipper plough for reliable, snag-free operation. YKK #3 footbox and shoulder zipper for minimal additional weight\u003c\/h5\u003e\n\u003c\/li\u003e\n\u003cli\u003e\n\u003ch5\u003eVertical chest baffles, horizontal baffles lower half and base, box wall baffle construction throughout\u003c\/h5\u003e\n\u003c\/li\u003e\n\u003cli\u003e\n\u003ch5\u003eFront draft collar is fitted around the neck and oversized at the shoulders to retain warmth\u003c\/h5\u003e\n\u003c\/li\u003e\n\u003cli\u003e\n\u003ch5\u003eSea to Summit Guarantee is offered for the Lifetime of this product\u003c\/h5\u003e\n\u003c\/li\u003e\n\u003c\/ul\u003e\n\u003ch3\u003eTechnical Specs\u003c\/h3\u003e\n\u003cul\u003e\n\u003cli\u003eBest Use: Ultralight Backpacking\u003cbr\u003e\n\u003c\/li\u003e\n\u003cli\u003eComes With: 40D recycled, bluesign APPROVED nylon compression bag\u003cbr\u003e\n\u003c\/li\u003e\n\u003cli\u003eInsulation: RDS certified, 950+ non-PFAS Ultra-Dry Down\u003cbr\u003e\n\u003c\/li\u003e\n\u003cli\u003eShape: Mummy\u003cbr\u003e\n\u003c\/li\u003e\n\u003cli\u003eZip Options: Free-Flow zipper system\u003c\/li\u003e\n\u003cli\u003eWeight: 784 g\u003c\/li\u003e\n\u003cli\u003eFill Weight: 480 g\u003c\/li\u003e\n\u003cli\u003eCompressed Volume: 7.0 L\u003c\/li\u003e\n\u003cli\u003eCompression Sack: 13 L\u003c\/li\u003e\n\u003cli\u003eTemperature Rating (ISO Lower Limit): -9°C\u003c\/li\u003e\n\u003cli\u003eWomen's Temp Rating (ISO Comfort): -3°C\u003cbr\u003e\n\u003c\/li\u003e\n\u003cli\u003eFits Up To Height: 185 cm\u003c\/li\u003e\n\u003c\/ul\u003e"}
Why choose us?
Simply The Best
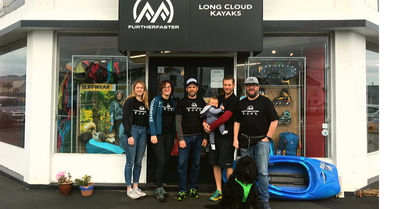
Further Faster hasn’t been on the scene long, but it’s already part of the furniture for the Christchurch outdoors community.